.png)


.webp)

This guide will help you connect our service’s MCP to an AI agent and start sending WhatsApp messages directly—from the AI chat, via an IDE, or through automation systems.
You can choose the most convenient connection method depending on your use case, from a quick start to advanced automation.
What You Get After Connecting
After installing MCP, the AI agent will be able to:
- send WhatsApp messages to a phone number;
- use templates or generate text dynamically;
- receive delivery status;
- work in conjunction with CRMs, websites, and internal systems;
- be part of automated workflows.
MCP Setup Examples for Different Applications
Below are examples of how to connect and use our MCP server with various tools: N8N, ChatGPT API, and VSCode.
Authorization
The MCP server uses the following HTTP header for authentication:
Authorization: Bearer <token>
How the Authorization Token Is Generated
The token is a Base64-encoded string in the format:
<app>:<secret>
Example
Input:
app = 123
secret = asdf
String before encoding:
123:asdf
Base64 result:
MTIzOmFzZGY=
Final header:
Authorization: Bearer MTIzOmFzZGY=
Setup for N8N
To integrate with N8N, use the block:
"Message an assistant"
and connect it to the "MCP client tool".
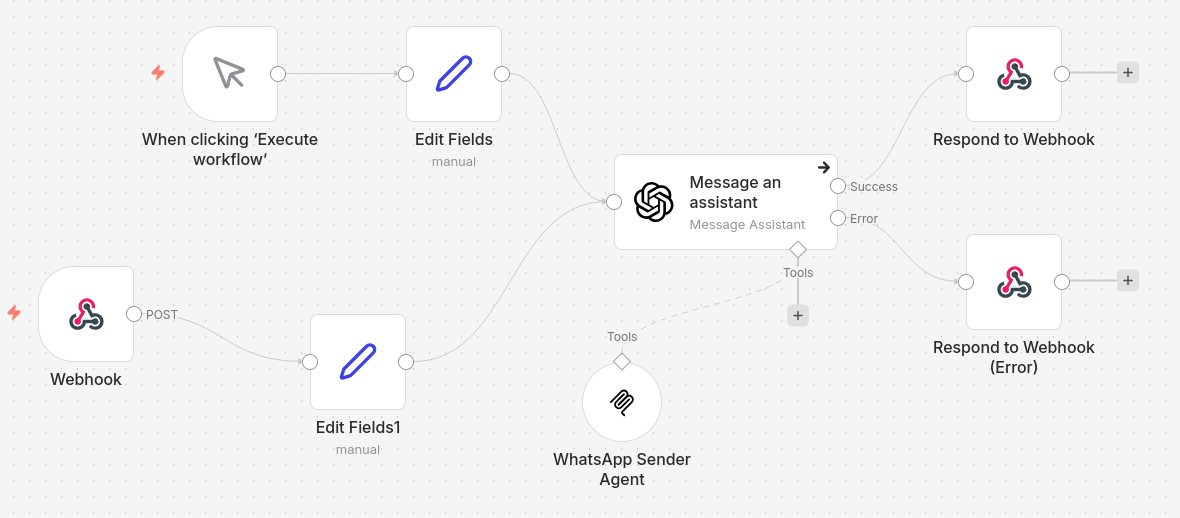
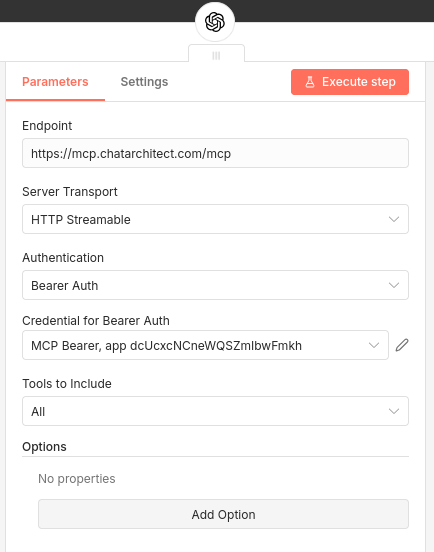
MCP Client Tool Settings:
- Authentication →
Bearer Auth - Credential for Bearer Auth → enter your authorization token
After configuration, MCP will be available as a tool inside your workflow.
ChatGPT API Request with MCP
Below is an example curl request to the OpenAI API using MCP as a tool.
Variables:
$OPENAI_KEY— OpenAI API key$CA_TOKEN— MCP authorization token
Example Request:
curl --request POST \
  --url https://api.openai.com/v1/responses \
  --silent \
  --header 'Content-Type: application/json' \
  --header "Authorization: Bearer $OPENAI_KEY" \
  --data "
{
  \"model\": \"gpt-5-nano\",
  \"input\": \"Send message **hello 2118** to WhatsApp number 996770297807\",
  \"tools\": [
    {
      \"type\": \"mcp\",
      \"server_label\": \"whatsapp_sender\",
      \"server_description\": \"MCP server allows sending messages to WhatsApp\",
      \"server_url\": \"https://mcp.chatarchitect.com/mcp\",
      \"authorization\": \"$CA_TOKEN\",
      \"require_approval\": \"never\"
    }
  ]
}"
In this example, the model is granted access to the MCP server, which enables sending WhatsApp messages.
Connecting MCP to VSCode
Follow these steps to connect MCP to VSCode:
Step 1. Create a Folder
In your project root, create:
.vscode
Step 2. Create mcp.json
Example configuration:
{
  "servers": {
    "chatarchitect-mcp": {
      "type": "http",
      "url": "https://mcp.chatarchitect.com/mcp",
      "headers": {
        "Authorization": "Bearer <token>"
      }
    }
  }
}
Step 3. Usage
- Open the chat window (CTRL + ALT + I)
- Enter the following message:
Send a WhatsApp message "hello from vscode" to the number 996770297807
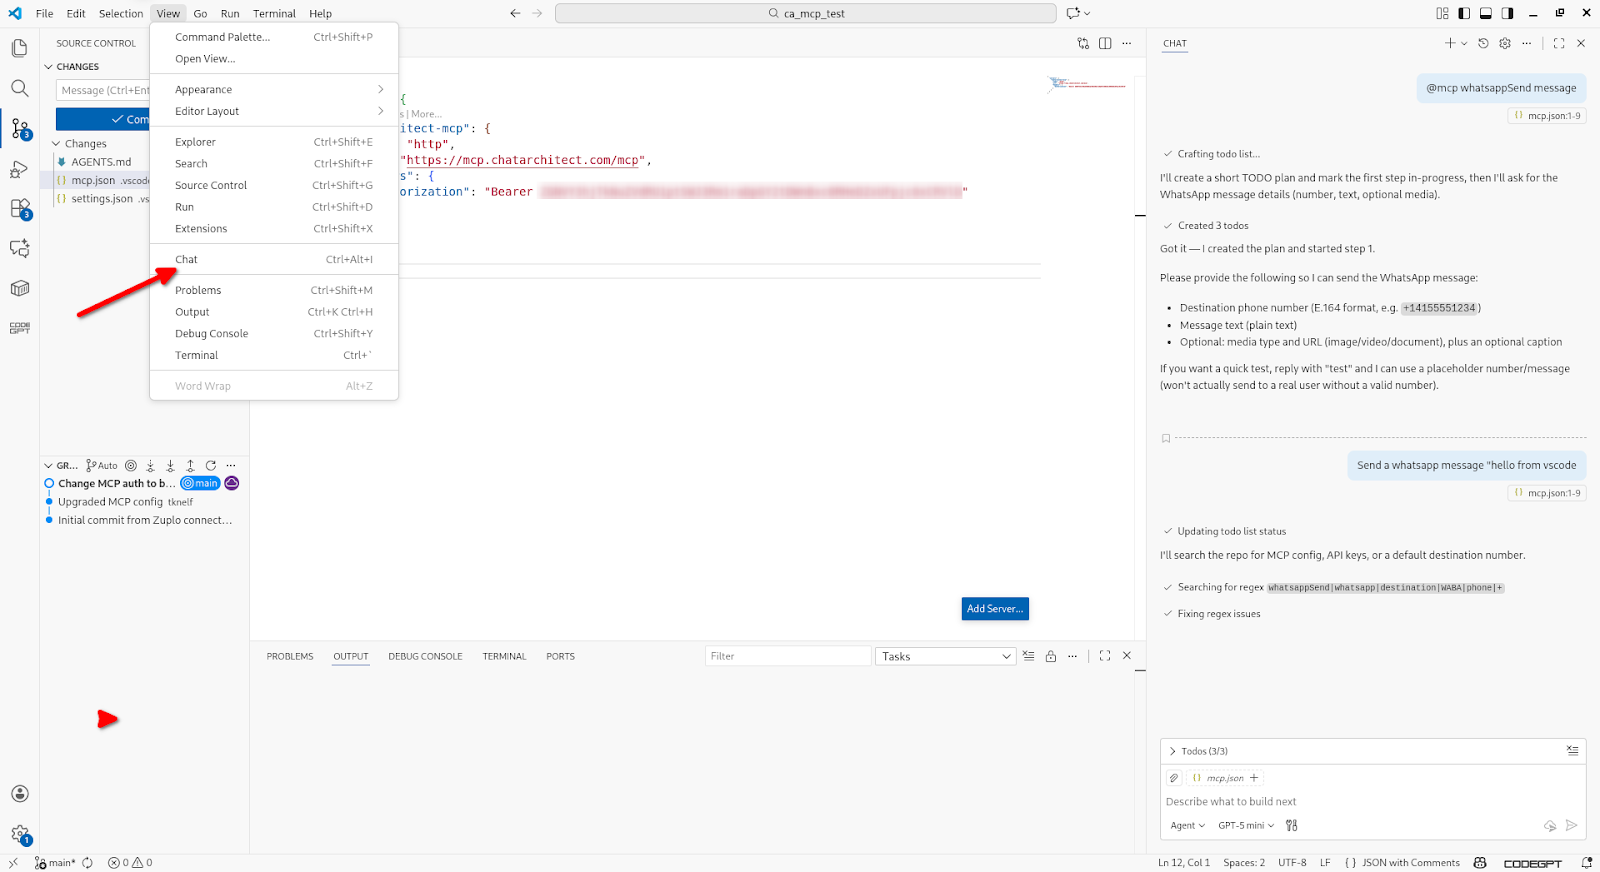
The MCP server will process and send the message using the configured connection.
Verification
After connecting, try the following commands:
- “Send a WhatsApp message to a client with number +7…”
- “Remind the client about the meeting tomorrow at 12:00.”
- “Notify the user that the request has been accepted.”
If the message is sent successfully, MCP is installed correctly.
Security and Control
- all AI actions are logged;
- message types can be restricted;
- confirmations and rate limits are supported;
- MCP can be disabled at any time.
You’re Ready
Your AI agent now not only analyzes and recommends but also acts—sending WhatsApp messages automatically and intentionally.
If you need help with setup or custom scenarios, the ChatArchitect team is always ready to assist.


